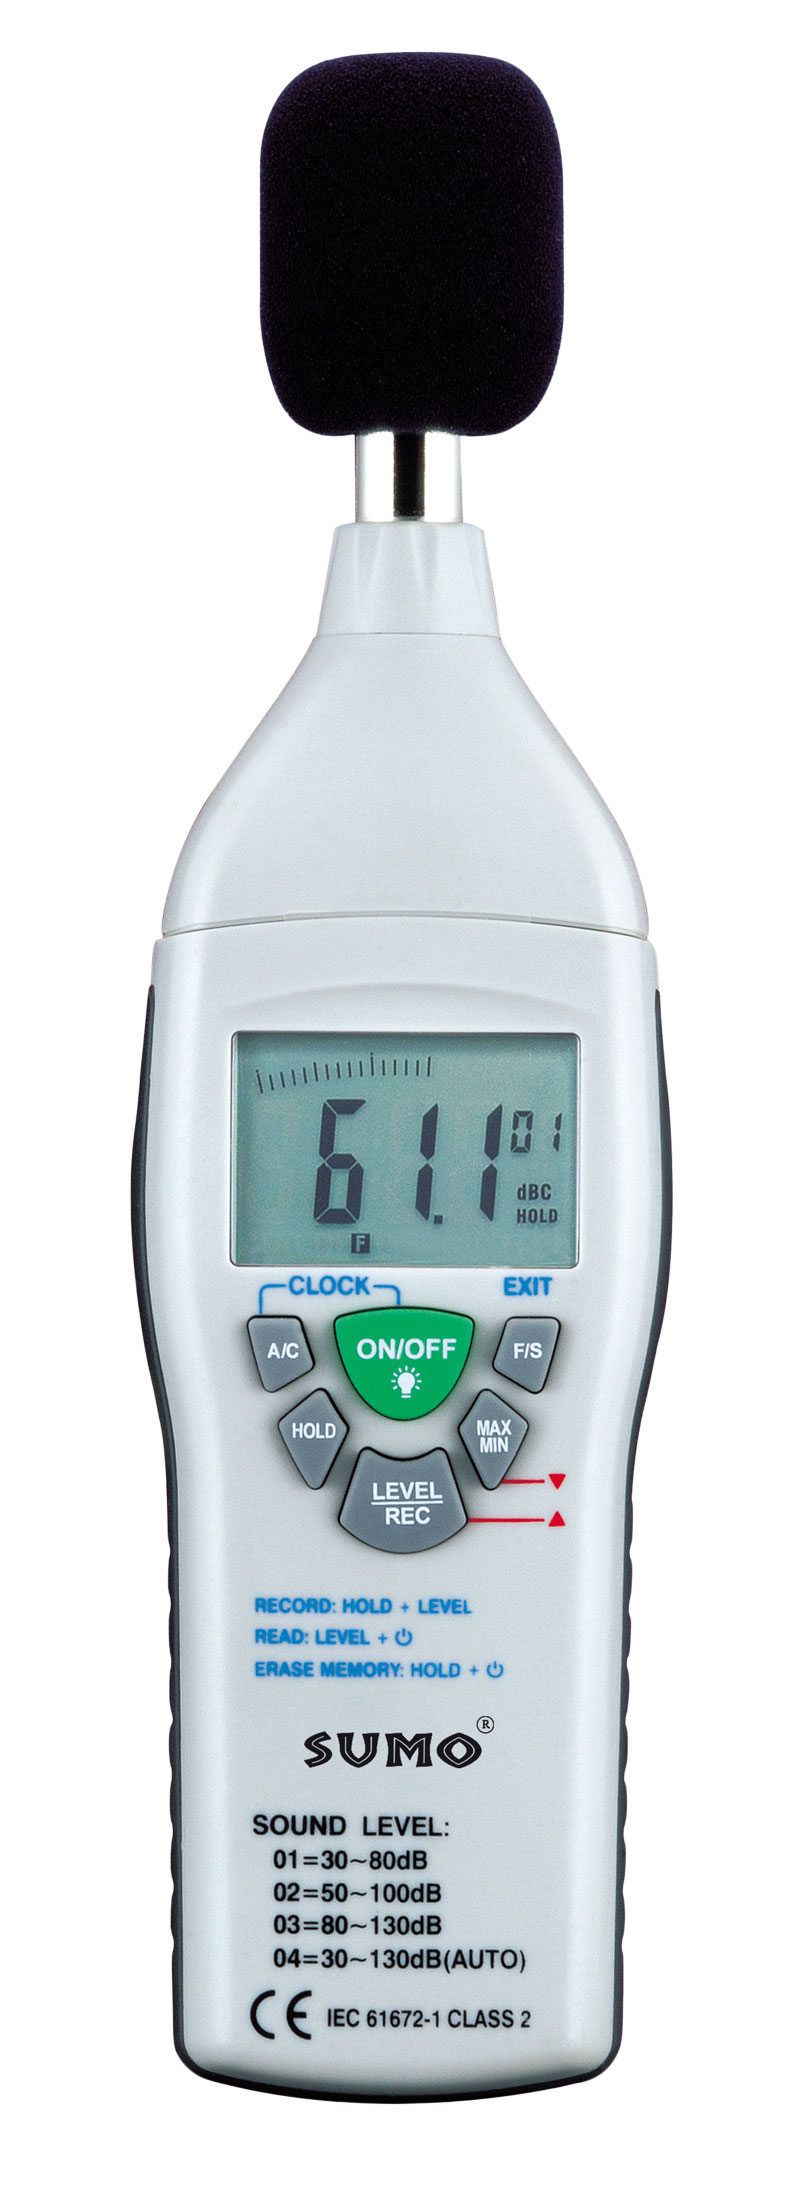
เครื่องวัดเสียง รุ่น DT-815 SUMO
เครื่องวัดเสียง ถูกออกแบบมาสำหรับโครงการลดเสียงรบกวน ควบคุมคุณภาพ ป้องกันและแก้ไขปัญหาทุกชนิดของการวัดเสียงสิ่งแวดล้อม ถูกออกแบบมาเพื่อนำไปใช้วัดเสียงใน โรงงาน โรงเรียน สำนักงาน การจราจร ครัวเรือน และอื่นๆ
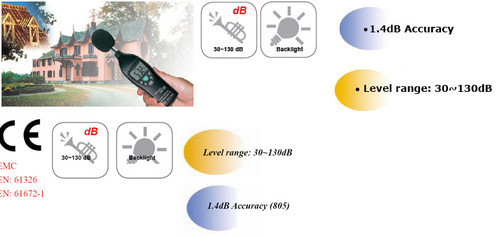
- ค่าความแม่นยำ ±1.4 เดซิเบล
- ระดับเสียง 2 ระดับ ต่ำ 30-80 เดซิเบลและสูง 80-130 เดซิเบล
- Accuracy ±1.4dB
- Level 2 setting LOW : 30dB-80db and HIGH: 80dB-130dB
รายละเอียด
เครื่องวัดเสียง รุ่น DT-815 SUMO
Sound Level Meters Mod. DT-815 SUMO

รายละเอียดสินค้า/Description of Goods
- เครื่องวัดเสียง ถูกออกแบบมาสำหรับโครงการลดเสียงรบกวน ควบคุมคุณภาพ ป้องกันและแก้ไขปัญหาทุกชนิดของการวัดเสียง สิ่งแวดล้อม ถูกออกแบบมาเพื่อนำไปใช้วัดเสียงใน โรงงาน โรงเรียน สำนักงาน การจราจร ครัวเรือน และอื่นๆ
- Sound Level MetersDT-815 Sound Level Meters is designed for noise project, quality control, illness prevention & cure and all kinds of environment sounds measurement, It is applied to the sounds measurement at factory, school, office,traffic access and household, etc.
คุณสมบัติ/Feature
วัด สูงสุด และ ต่ำสุด/MAX & MIN measurements
ช่วงการแสดงผลด้านบน/Over range display
ช่วงการแสดงผลด้านใต้/Under range display
การถ่วงน้ำหนัก A & C/A & C Weighting
การตอบสนอง เร็ว และ ช้า/FAST & SLOW response
ตัวเลขแสดงผลLCDที่มีรายละเอียด 0.1เดซิเบล, กราฟแท่ง และไฟหลัง/Digit LCD display a resolution of 0.1dB , bar graph & white backlight
อ่านความจำ/Readings memories
การบำรุงรักษา และ การทำความสะอาด/Maintenance & Clearing
- การซ่อมแซมหรือการบํารุงรักษาที่ไม่ครอบคลุมในคู่มือนี้ควรดําเนินการโดยบุคลากรที่ชำนาญ
- เช็ดตัวเครื่องเป็นระยะด้วยผ้าแห้ง อย่าใช้โซลเว้นท์หรือตัวทำลายกับเครื่องมือนี้
- Repair or servicing not covered in this manual should be performed by qualified personnel.
- Periodically wipe the case with a dry cloth. Do not use solvents or eradicate on this instrument.
สัญลักษณ์และการทำงาน/NAME AND FUNCTIONS
☀ Windscreen (ที่บังลม)
☀ LCD แอลซีดี
☀ ปุ่มเปิด/ปิด และแบ็คไลท์/Power on/off and backlight button กดปุ่มหนึ่งครั้งเพื่อเปิด / ปิดแบ็คไลท์ กดปุ่มอย่างต่อเนื่องจนกระทั่งตัวเลข 3,2,1 แสดงบนหน้าจอ แล้วหายไปเมื่อปิดเครื่อง
Press the button one time for on / off of backlight, press the button continuously until the number 3,2,1 showing on the screen and then disappear for power off.
☀ ปุ่มเลือกการถ่วงน้ำหนักความถี่/ Frequency weighting select button
A : A-Weighting
C : C-Weighting
☀ ปุ่มหยุด/HOLD button
1. Data hold function ปุ่มการทำงาน Hold กดปุ่ม “HOLD” เพื่อหยุดการอ่านในหน้าจอและกดอีกครั้งเพื่อออกจากการบันทึก
Press button “HOLD” to freeze the reading in the display and press once more to exit the record.
2. Data zero function ปุ่มการทำงาน zero กดปุ่มอย่างต่อเนื่องก่อนเปิดเครื่อง คลายปุ่มเมื่อหน้าจอแสดง '‘CL 'หลังจากเปิดมิเตอร์ ซึ่งระบุว่าข้อมูลใน DATALOGGER ถูกลบไปแล้ว
Press the button continuously before power it on, loosen the button when the display showing ‘CL’ after the meter power on, which indicates that the data in DATALOGGER has been deleted.
☀ LEVEL range and REC functions
1. Range select button (ปุ่มเลือกพิสัย)ทุกครั้งที่กดปุ่ม ‘LEVEL’ ช่วงระดับพิสัยจะเปลี่ยนระดับ ระหว่าง ‘Lo(01)’ level, ‘Med(02)’ level, ‘Hi(03)’ และระดับ Auto(04) ในวงกลม
Each time you press ‘LEVEL’ button, the level range will change between ‘Lo(01)’ level, ‘Med(02)’ level, ‘Hi(03)’ level and ‘Auto(04)’ level in the circular.
2. REC record function (50) การทำงานของโหมด บันทึก
กดปุ่ม ‘Hold’ ค้างไว้เพื่อหยุดข้อมุลก่อน จากนั้นกด ‘REC’ เพื่อเก็บข้อมูลไว้ในฐานข้อมูลของมิเตอร์ เมื่อจอแสดงผล REC หมายถึงการทำงานสำเร็จ กดปุ่ม ‘hold’ กลับอีกครั้งเพื่อการวัด
Press button ‘hold’ to freeze data firstly, then press ‘REC’ to hold the data in meter’s data-base. When the display show REC means operation successful. Press ‘hold’ again back to measure
3. Data reading function ฟังก์ชั่นการอ่านข้อมูล
กดปุ่ม ‘REC’ อย่างต่อเนื่องจนกระทั่งการแสดงสัญลักษณ์ ‘DATA’ ขึ้นบนหน้าจอ เข้าสู่รูปแบบการอ่าน
Press button ‘REC’ continually until the display of symbol ‘DATA’ on screen, enter the model of reading.

กดปุ่ม "MAX" และ "HOLD" เพื่ออ่านวันที่และเวลาของข้อมูล และปุ่ม ‘REC’ เพื่ออ่านข้อมูลถัดไป กดปุ่ม ‘FAST’ เพื่อออกจากโหมด
Press “MAX” and “HOLD” button to read data’s date and time, and ‘REC’ button to read the next data. Press “FAST” button to exit this model.
☀ MAX/MIN button: Maximum and Minimum hold ปุ่มสูงสุด/ต่ำสุด
กดปุ่มนี้หนึ่งครั้งเพื่อเข้าสู่การวัด MAX / MIN, ‘MAX’ จะปรากฏบนแอลซีดี, ระดับเสียงสูงสุดจะถูกบันทึกและเก็บไว้จนกว่าระดับเสียงที่สูงขึ้นจะถูกจับ กดปุ่มอีกครั้ง ‘MIN’ จะปรากฏบนแอลซีดี และระดับเสียงขั้นต่ำจะถูกจับและจัดเก็บไว้จนกว่าระดับเสียงต่ำกว่าจะหยุดและถูกจับ กดปุ่มอีกครั้งเพื่อออกจากการวัด MAX / MIN
Press this button for one time to enter MAX/MIN measurement, ‘MAX’ will appear on LCD, maximum sound level will be captured and held until higher sound level is captured. Press the button again, ‘MIN’ will appear on LCD and minimum sound level will be capture and held until new lower sound level is captured. Press the button one more time to exit MAX/MIN measurement.
☀ FAST/SLOW button : time weighting selection ปุ่มเร็ว/ช้า : เลือกเวลาการถ่วงน้ำหนัก
เร็ว: การวัดตัวอย่างแบบเร็ว, 1ครั้งต่อ125/FAST: Fast sampling measurement, 1 time per 125mS.
ช้า: การวัดตัวอย่างแยบช้า, 1ครั้งต่อวินาที/SLOW: Slow sampling measurement, 1 time per second.
การปรับเวลาchip/The time chip adjustment
กดปุ่ม A/C แล้วเปิดเครื่อง, เมื่อสัญลักษณ์ ‘SET’ นี้ ปรากฏขึ้น หลังจากนั้น คลาย ‘ A / C ’ มิเตอร์จะอยู่ภายใต้โหมดการปรับเวลา
Press ‘A/C’ button and then power it on, when ‘SET’ symbol displays then loosen ‘A/C’ , the meter will be under time adjustment mode

☀ Methods for each model are as below; วิธีการใช้สำหรับแต่ละจุดมีดังนี้
กดปุ่ม “ LEVEL” เพื่อปรับข้อมูลขึ้น และปุ่ม “max/min” เพื่อปรับข้อมูลลง กดปุ่ม “hold” เพื่อหยุดการตั้งค่าข้อมูลที่ตั้งค่าไว้แล้วออกจากจุดนี้
Press “level” button to up adjust the data, and “max/min” button to down-adjust the data, press “hold” button to hold the data setup which you set and exit this model.
ขั้นตอนการสอบเทียบ/CALIBRATION PROCEDURES
- ทำการตั้งค่าสวิตช์ต่อไปนี้
- น้ำหนักความถี่
- การถ่วงเวลา : ความเร็ว
- ช่วงระดับ : (02)/50-100 เดซิเบล
- ใส่ตัวไมโครโฟนอย่างระมัดระวังลงในรูเสียบ½นิ้วของเครื่องสอบเทียบ (94dB @ 1kHZ)
- เปิดสวิตช์ของเครื่องสอบเทียบแล้วปรับ CALL potentiometer ที่หน้าจอของหน่วยจะแสดงค่า 94.0เดซิเบล
- Make the following switch settings
- Frequency weighting : A-weighting
- Time weighting : FAST
- Level range : (02)/50-100dB
- Insert the microphone housing carefully into the ½ inch insertion hole of the calibrator (94dB @ 1kHZ)
- Turn on the switch of calibrator and adjust the CALL potentiometer of the unit 94.0dB is displayed.
หมายเหตุ
- สินค้าทั้งหมดได้รับการสอบเทียบอย่างดีก่อนที่จะส่ง
- รอบการเปรียบเทียบที่แนะนำ 1 ปี
- NOTE All products are well calibrated before shipment.
- Recommended recalibration cycle 1 year
การเตรียมการวัด/MEASUREMENT PREPARATION
- ถอดฝาครอบแบตเตอรี่ที่ด้านหลังและใส่แบตเตอรี่ 9V หนึ่งก้อน
- ใส่ฝาหลังกลับไปเหมือนเดิม
- เมื่อแรงดันแบตเตอรี่ลดลงต่ำกว่าแรงดันไฟฟ้าหรืออายุแบตเตอรี่ สัญลักษณ์นี้
 จะปรากฎขึ้นบนหน้าจอแอลซีดี
- เปลี่ยนแบตเตอรี่ขนาด 9 โวลต์
- เมื่อใช้ AC อะแดปเตอร์ , เสียบปลั๊กของอะแดปเตอร์เข้ากับช่องเสียบ DC 9V ที่แผงด้านข้าง
 จะปรากฎขึ้นบนหน้าจอแอลซีดี
- Remove the battery cover on the back and put in one 9V battery
- Recover the back cover.
- When battery voltage drops below the operating voltage or battery aging. this symbol
 will appear on LCD.
- Replace the 9V battery.
- When the AC adapter is used, insert the plug of the adapter into the DC 9V connector on the side panel.
 will appear on LCD.
 ขั้นตอนการดำเนินงาน/ OPERATING PROCEDURE
1. เปิดเครื่องมิเตอร์
2. กดปุ่ม ‘LEVEL’ เพื่อเลือกระดับที่ต้องการ, ‘UNDER’ หรือ ‘OVER’ ไม่ปรากฎบนหน้าจอแอลซีดี
3. เลือก ‘dBA’ สำหรับระดับเสียงรบกวนทั่วไปและ ‘dBC’ สำหรับวัดระดับเสียงของวัสดุอคูสติก
4. เลือก ‘FAST’ สำหรับเสียงทันทีและ ‘SLOW’ สำหรับระดับเสียงโดยเฉลี่ย
5. เลือกปุ่ม "MAX / MIN" สำหรับการวัดระดับเสียงรบกวนสูงสุดและต่ำสุด
6. 1-1.5 meter. ถือเครื่องมืออย่างสะดวกสบายในมือหรือติดตั้งกับขาตั้งกล้องและวัดระดับเสียงในระยะห่าง 1-1.5 เมตร
1. Power on the meter
2. Press ‘LEVEL’ button to select desired level, base on ‘UNDER’ or ‘OVER’ do not appear on LCD.
3. Select ‘dBA’ for general noise sound level and ‘dBC’ for measuring sound level of acoustic material
4. Select ‘FAST’ for instant sound and ‘SLOW’ for average sound level.
5. Select ‘MAX/MIN’ button for measuring maximum and minimum noise level.
6. Hold the instrument comfortable in hand or fix on tripod and measure sound level at a distance of 1-1.5 Meters
ข้อสังเกตุ/NOTICE
1. อย่าเก็บหรือใช้งานเครื่องมือในบริเวณสภาพแวดล้อมที่มีอุณหภูมิและความชื้นสูง
2. เมื่อไม่ใช้งานเป็นเวลานาน กรุณานำถ่านออกเพื่อหลีกเลี่ยงการรั่วไหลของของเหลวในถ่านและการสกัดกร่อนบนเครื่องมือ
3. เมื่อนำเครื่องมือออกมาวัดเสียงของลม จำเป็นต้องติดที่บังลมเพื่อป้องกันไม่ให้ได้รับสัญญาณที่ไม่พึงปรารถนา
4. วางไมโครโฟนไว้ในที่แห้งและหลีกเลี่ยงการสั่นสะเทือนที่รุนแรง
1. Do not store or operate the instrument at high temperature and high humidity environment.
2. When not in use for long time, please take out the battery to avoid battery liquid leakage and cautery on the instrument.
3. When using the instrument in the presence of wind. It is a must to mount the windscreen to not pick up undesirable signals.
4. Keep microphone dry and avoid severe vibration.
ที่มา :: www.smtinter.com , www.sgb.co.th , www.shw.co.th
ประเภทสินค้า :: มัลติมิเตอร์ , ดิจิตอลมัลติมิเตอร์ , อนาล็อกมัลติมิเตอร์
Facebook :: sumo.siamglobal
ประเภทสินค้า :: มัลติมิเตอร์ , ดิจิตอลมัลติมิเตอร์ , อนาล็อกมัลติมิเตอร์
Facebook :: sumo.siamglobal
ภาพประกอบ :: Siam Global Group Co.,Ltd.


****************************************
ตอบลบSiamGlobalGroup Co.,Ltd. // ไม้ตียุง
ดิจิตอลมัลติมิเตอร์ // อนาล็อกมัลติมิเตอร์
****************************************
****************************************
ตอบลบไม้ตียุง // มัลติมิเตอร์ // โคมไฟไร้สาย
****************************************